Big bad rant that has been sitting in my inbox for a month and a half. I've been hesitant to post this, let alone think about this since it makes me sad and incredibly angry as well. My fiancee knows about this situation, and also thinks it's bs.
First a little background. My younger sister has been dating this guy off and on for a few years and currently they're on... and she's pregnant. They are not married currently, but they do plan on marrying after the baby is born so the state can pay for the birth and medical items for her and the baby. In addition, he's black and my family is white. While this shouldn't matter, my dad is a semi-closet racist and gets angry, non-talkative and downright mean whenever she and her boyfriend come around to my parent's house. I have not seen this interaction, but this is because I live on the west coast while they live near Philly and only have hearsay to go on; however I have seen how my dad's mood stiffens and changes around anyone who isn't white.
Oh, it gets better from here. A month or two ago my little sis and her boyfriend got into a car accident and all involved parties were able to walk away from the crash with all of the air bags deployed and my sis's car totaled. Her boyfriend was driving but the lady that hit their car ran the light so this was in no way his fault. Unfortunately my dad is a jerk and this doesn't help his racism and misguided unpleasantness towards this poor guy.
My involvement with this is that my "dad" e-mails me back in early June and says he's deciding that he will not be coming to our wedding. His reasoning is that he "will not put [him]self in the same room with the person who knocked up but will not marry [my] sister." His words, verbatim. First reaction was that I don't have to tell him that I didn't want anyone walking me down the aisle, second was how dare he miss out on our wedding because of something so petty. My little sister and I suspect that the real reason he's not coming is because she's dating a black man, and I invited him without a second thought or hesitation.
I had something all typed up, nice, pretty, and eloquent that basically told him he was a f'ing child, without all the cussing I thought of when I first read his e-mail. There was some crying, ranting, pacing, and throwing of papers while I let it all out in front of my fiancee. He was a dear, let me throw my temper-tantrum and then helped me re-work the e-mail I had drafted in a fit of rage.
The e-mail still resides in my inbox, but I'm leaning towards not sending it his way. My thoughts are that he's giving me a free pass not to talk to him, and I'm sort of fine with that even though I want to chastise and smack him upside his head. The reasoning behind not talking to him is because he cowardly sent me an e-mail instead of calling me and is missing out on his eldest daughter's wedding who is the first to get married out of his children; this is all inexcusable to me. True, I think this is a little bratty, but I feel justified by not responding.
Tuesday, July 20, 2010
Friday, July 16, 2010
Ze Dress in all its Altered Glory!
I had a little bit of a hard time with this since I gained a bit too much "happy" weight since a year and a half ago when I bought the dress. My whole goal was to start going to the gym beginning sometime in March to start getting in shape, but that didn't take. I blame a lot of it on stress from the massive accounting project (I had no idea was going to take so long or be so difficult) and started consuming about a fifth of rum a week and stress snacking for the two months I was working on the damn thing. It took almost a week to recover from this before I started a summer business law class that also had a large group project that took more time than expected.
Overall, I failed to go to the gym like I planned, but I did join up with the Rolling Hills Derby Dames in an attempt to make friends, get some exercise and learn a new sport. Granted it had been a while since I had been on quads and I'm a bit klutzy, but it is a great workout and the gals are fun. This has finally gotten me motivated to go to the gym with my fiancee (who's been going regularly for over a month) because I've been quite pissed at myself for getting so out of shape. Hopefully I'll be able to at least shed 5lbs before my wedding date so I don't look too chubby in my dress.
With that, my first fitting in late May was really disappointing because I knew that I had gotten fat, I just didn't know if I had gotten too fat to let the dress out without damaging the dress. At this time the David's Bridal seamstress and I had decided that we would stick with changing the neckline from straight across to a sweetheart and put in the bustling since I had a goal to loose some weight.
The second fitting came at the end of June and I still hadn't made any progress. I had expected this and thought that putting in a corset backing would help. The seamstress was very kind, pinned in the concept for me, and viola the dress finally felt like it fit and I could breathe again. Once again the dress went into alterations and stayed out of my closet which made me a little upset but I knew that it would eventually be in my possession.
This last Wednesday I got my dress back and couldn't be happier! The corset ribbon that I made for it worked perfectly and looks beautiful. The dress even accents my curves instead of squashing them into the dress and I couldn't be happier with the way it looks on me. So this is what the dress looks like now in all its glory, but I might need to re-work the sweetheart neckline since it looks thrown in instead of thought out.


So happy! 19 days left!
Thursday, July 15, 2010
Corset Ribbon
I forgot to take pictures throughout the process so my doodling will need to suffice.
Step one: find your ribbon
I chose a light blue sheer ribbon and a white satin ribbon so that I could see the light blue ribbon. My dress also has a sheer organza overlay and has around the same color of blue already in the dress so this works well. I believe I chose a 1-1/2" wide ribbon for both and bought at least a 4 yard spool.


Step two: sewing together
 This is where the doodles come in because I just went for it, sewed it all up and then realized I should have taken photos. Line up the sheer ribbon on top of the white satin ribbon and sew straight across the ends to have them together. Make sure that they're aligned because this is a guide for sewing the rest together.
Step three: the pull
 I call it the pull because later, after all the sewing is finished, you will be pulling this to turn the ribbon right side out. Pretty straight forward, find something long, durable and thin like twine or thick string and also sew straight across this to the ends that you just sewed together. Make sure the pull is secure so you don't loose it while turning the ribbon right side out, this may require you to do a few passes over it with the sewing machine.
Step three: fold
Fold the ribbon over the twine hot dog style so that the twine is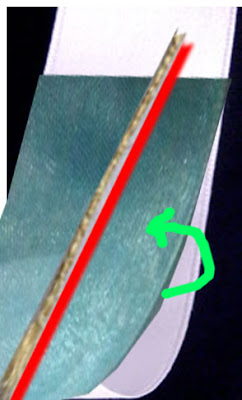
 on the inside with the ribbon you eventually want to be on the outside. If you want to, take the iron to the fold so you get a crease and make it easier on yourself in the next step. I didn't do this and I wished later that I had individually ironed a crease into the layers because it probably would have made things easier. Oh well, live and learn.
Step four: lots of sewing
 This requires lots of patience because you need to make sure you are sewing both sides of the ribbon sandwiched inside and ribbon currently outside without running over your pull all while trying to get the stitch as straight as possible. Don't worry if you don't get everything completely straight because no one will really notice unless they look over the entire length and are looking for imperfections.
Step five: pull the pull

 VERY CAREFULLY pull on the other end of the pull that is not sewn down so that the ribbon on the sewn end starts to roll inside to turn the ribbon right side out. This also requires lots of patience but doesn't take nearly as long to do as the sewing.
Step five: spot check
Most likely there will be one or two places that the organza ribbon did not get sewn into the satin ribbon. Calmly and patiently turn the ribbons inside out until you get to the trouble spot, pop some of the seam until you can correct the positioning of the ribbon and run it over with the sewing machine again. Turn it right side out and double check the correction.
Step six: iron
What I did to help was grab a long metal rod, feed it all the way through and used it to make sure everything inside was laying flat and not bunched up. I ironed on a medium heat to crease everything and made sure my seam remained on the same side and didn't twist around as I removed the rod and then went over it a second time to be sure. It does have some areas that are a bit chunkier than others but you can't really tell in this photo and I don't think anyone will be able to tell when it's strung in the corset backing either.


Step seven: lace and sew up
This is simple; lace up your dress, make sure the length is correct, snip off the excess and then you can just turn the ends inward and either hand stitch or run them over with the sewing machine to close the ends.
Ta Da!
=check!
Step one: find your ribbon
I chose a light blue sheer ribbon and a white satin ribbon so that I could see the light blue ribbon. My dress also has a sheer organza overlay and has around the same color of blue already in the dress so this works well. I believe I chose a 1-1/2" wide ribbon for both and bought at least a 4 yard spool.


Step two: sewing together
 This is where the doodles come in because I just went for it, sewed it all up and then realized I should have taken photos. Line up the sheer ribbon on top of the white satin ribbon and sew straight across the ends to have them together. Make sure that they're aligned because this is a guide for sewing the rest together.
Step three: the pull
 I call it the pull because later, after all the sewing is finished, you will be pulling this to turn the ribbon right side out. Pretty straight forward, find something long, durable and thin like twine or thick string and also sew straight across this to the ends that you just sewed together. Make sure the pull is secure so you don't loose it while turning the ribbon right side out, this may require you to do a few passes over it with the sewing machine.
Step three: fold
Fold the ribbon over the twine hot dog style so that the twine is

 on the inside with the ribbon you eventually want to be on the outside. If you want to, take the iron to the fold so you get a crease and make it easier on yourself in the next step. I didn't do this and I wished later that I had individually ironed a crease into the layers because it probably would have made things easier. Oh well, live and learn.
Step four: lots of sewing
 This requires lots of patience because you need to make sure you are sewing both sides of the ribbon sandwiched inside and ribbon currently outside without running over your pull all while trying to get the stitch as straight as possible. Don't worry if you don't get everything completely straight because no one will really notice unless they look over the entire length and are looking for imperfections.
Step five: pull the pull

 VERY CAREFULLY pull on the other end of the pull that is not sewn down so that the ribbon on the sewn end starts to roll inside to turn the ribbon right side out. This also requires lots of patience but doesn't take nearly as long to do as the sewing.
Step five: spot check
Most likely there will be one or two places that the organza ribbon did not get sewn into the satin ribbon. Calmly and patiently turn the ribbons inside out until you get to the trouble spot, pop some of the seam until you can correct the positioning of the ribbon and run it over with the sewing machine again. Turn it right side out and double check the correction.
Step six: iron
What I did to help was grab a long metal rod, feed it all the way through and used it to make sure everything inside was laying flat and not bunched up. I ironed on a medium heat to crease everything and made sure my seam remained on the same side and didn't twist around as I removed the rod and then went over it a second time to be sure. It does have some areas that are a bit chunkier than others but you can't really tell in this photo and I don't think anyone will be able to tell when it's strung in the corset backing either.


Step seven: lace and sew up
This is simple; lace up your dress, make sure the length is correct, snip off the excess and then you can just turn the ends inward and either hand stitch or run them over with the sewing machine to close the ends.
Ta Da!
=check!
Thursday, July 8, 2010
Cake Num Num
We finally picked out a cake design! After months of perusing around the interweb I was able to narrow down the selection to a few cakes that my man and I could choose from. He eventually thought that this one was the one that should be our cake:

I did it one better (since I wanted chocolate buttercream frosting) and tweaked it in photoshop to look like this:

The venue said that they would be able to do this! I was trying to keep things simple and was even a little worried about how complex was too complex but I'm thrilled that we didn't have to go through the whole design selection portion all over again. The majority of the cake will be in buttercream but the blue bands will be in fondant instead of ribbon for cutting purposes and the white scrolls will have a little bit of silver cake dust on the raised parts to add a little *pop* to them.
But the fun didn't stop there. Once we decided on how the cake would look like, we needed to figure out what would go inside. It took a bit of communication with the catering people to find out if they could do this but we'll be having two layers of chocolate cake with peanutbutter buttercream (yum!) and one layer of vanilla cake with raspberry buttercream. I have no idea what this will taste like, since they don't do cake testings there, but I can only hope that it will turn out to be what I'm thinking it will taste like.
Subscribe to:
Comments (Atom)