To start off, just like most people, I made a template out of some thick cardboard I had lying around from boxes and packaging. The top and bottom have a 1" space before the "V" begins and I centered the point of the "V" at 3.5".

The next part I did in batches and did the easier top flap first by tracing

then taking my rotary cutter and cutting the suckers.


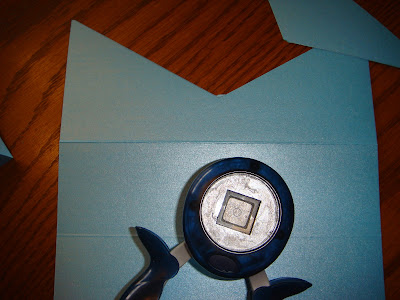
With the first and easiest part done I waited a little bit to figure out how to get the bottom point cut crisp and cleanly. I first tried to use the rotary cutter but found that I had one helluva time figuring out where the stopping point was. I then tried the X-acto knife but found that I couldn't get the cut straight, that I was over-cutting, or I couldn't seem to get the last little bit of paper to come off. After some hunting around I had an epiphany to use a punch to get the job done. The next challenge was to find a punch that could do the job. Unfortunately there are no punches that had the exact angle I wanted, but I even found it difficult to find a punch if I settled for one with a right angle that would punch a ^ instead of v. The difference was how I would insert the paper to get my desired edge; the v shape is more for corners, I was looking for an inner corner shaper if that makes any sense. So with some creativity and a certain method in my head I set out to our tiny Michaels store and found the only thing that would come close to what I wanted was a square punch. Sure, I had to creatively maneuver the paper to get the punch to get the desired pattern, but the end result yielded the crisp, clean look I was going for. Once I got what I wanted, I put the game plan into play.
First, trace

Then cut, but leave a little bit extra on the bottom of the "V" connected

just like this:

Then comes the "scary" part. Just yoink off the excess so you have an ugly looking corner. Don't worry about this because you'll be able to fix it later.

Then, with the handy-dandy square punch, or with whatever you found would work for you, trim the corner so it has the desired clean and crispness that would have been achieved if you had a big industrial cutter.


Lastly, after all is said and done look over your pocketfolds. If you're a stickler about the details you'll notice that after you cut this paper that the bottom side of the cut has some sort of a "lip" while the top side looks clean, like this:

I'm not sure if it's just with the Astrobright Glisten paper I'm using or if all papers do this but don't worry, it can be fixed simply by smoothing over the edge with your butter knife/boning folder. Then once you're done it's off to the next step: Securing the Pocket.
No comments:
Post a Comment